Matplotlib Python에서 매우 유용한 시각화 라이브러리입니다. NumPy 어레이를 기반으로 구축되었으며 더 광범위한 SciPy 스택과 작동하도록 설계된 다중 플랫폼 데이터 시각화 라이브러리입니다. 시각화는 엄청난 양의 데이터를 이해하고 지식을 추출하는 데 도움이 되므로 매우 중요한 역할을 합니다.
Matplotlib.pyplot.savefig()
이름에서 알 수 있듯이 savefig() 메소드는 이후에 생성된 그림을 저장하는 데 사용됩니다. 음모를 꾸미다 데이터. 생성된 그림은 이 방법을 사용하여 로컬 컴퓨터에 저장할 수 있습니다.
통사론: savefig(fname, dpi=없음, 면색상='w', edgecolor='w', 방향='세로', papertype=None, 형식=없음, transparent=False, bbox_inches=없음, pad_inches=0.1, 프레임온=없음, 메타데이터=없음)
매개변수:
| 매개변수 | 설명 |
| f이름 | 파일 이름 .webp'code-block'>
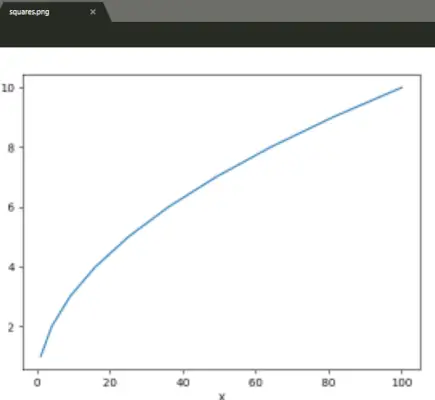
# importing required modules> import> matplotlib.pyplot as plt> > # creating plotting data> xaxis> => [> 1> ,> 4> ,> 9> ,> 16> ,> 25> ,> 36> ,> 49> ,> 64> ,> 81> ,> 100> ]> yaxis> => [> 1> ,> 2> ,> 3> ,> 4> ,> 5> ,> 6> ,> 7> ,> 8> ,> 9> ,> 10> ]> > # plotting> plt.plot(xaxis, yaxis)> plt.xlabel(> 'X'> )> plt.ylabel(> 'Y'> )> > # saving the file.Make sure you> # use savefig() before show().> plt.savefig(> 'squares.webp'> )> > plt.show()> | 출력 :
 예 2:
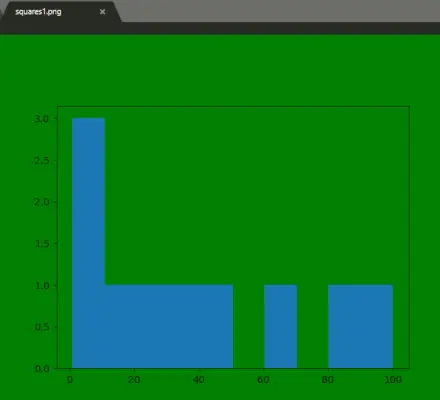
# importing the modules> import> matplotlib.pyplot as plt> > > # creating data and plotting a histogram> x> => [> 1> ,> 4> ,> 9> ,> 16> ,> 25> ,> 36> ,> 49> ,> 64> ,> 81> ,> 100> ]> plt.hist(x)> > # saving the figure.> plt.savefig(> 'squares1.webp'> ,> > bbox_inches> => 'tight'> ,> > pad_inches> => 1> ,> > transparent> => True> ,> > facecolor> => 'g'> ,> > edgecolor> => 'w'> ,> > orientation> => 'landscape'> )> > plt.show()> | 출력 :
|